
Products and labels
Pair and Publish Labels
Assign a product or variant to the intended Shelva label and confirm that its correct design reaches the shelf.
Before you begin
Confirm these items before you make changes:
- The correct location is selected.
- A physical label is registered to that location, unpaired, and not marked broken.
- An appropriate label size is available.
- The location’s Shelva Hub shows Online before you publish.
Pair from Configure
- Open Dashboard.
- Find the parent product or variant.
- Select Configure.
- Select Pair Label or Add Another Label.
- Choose Enter a Specific Barcode, Pick from Unpaired Labels, or Simulated Label.
- Confirm the label and review its preview.
- For a physical label, select Save & Publish.
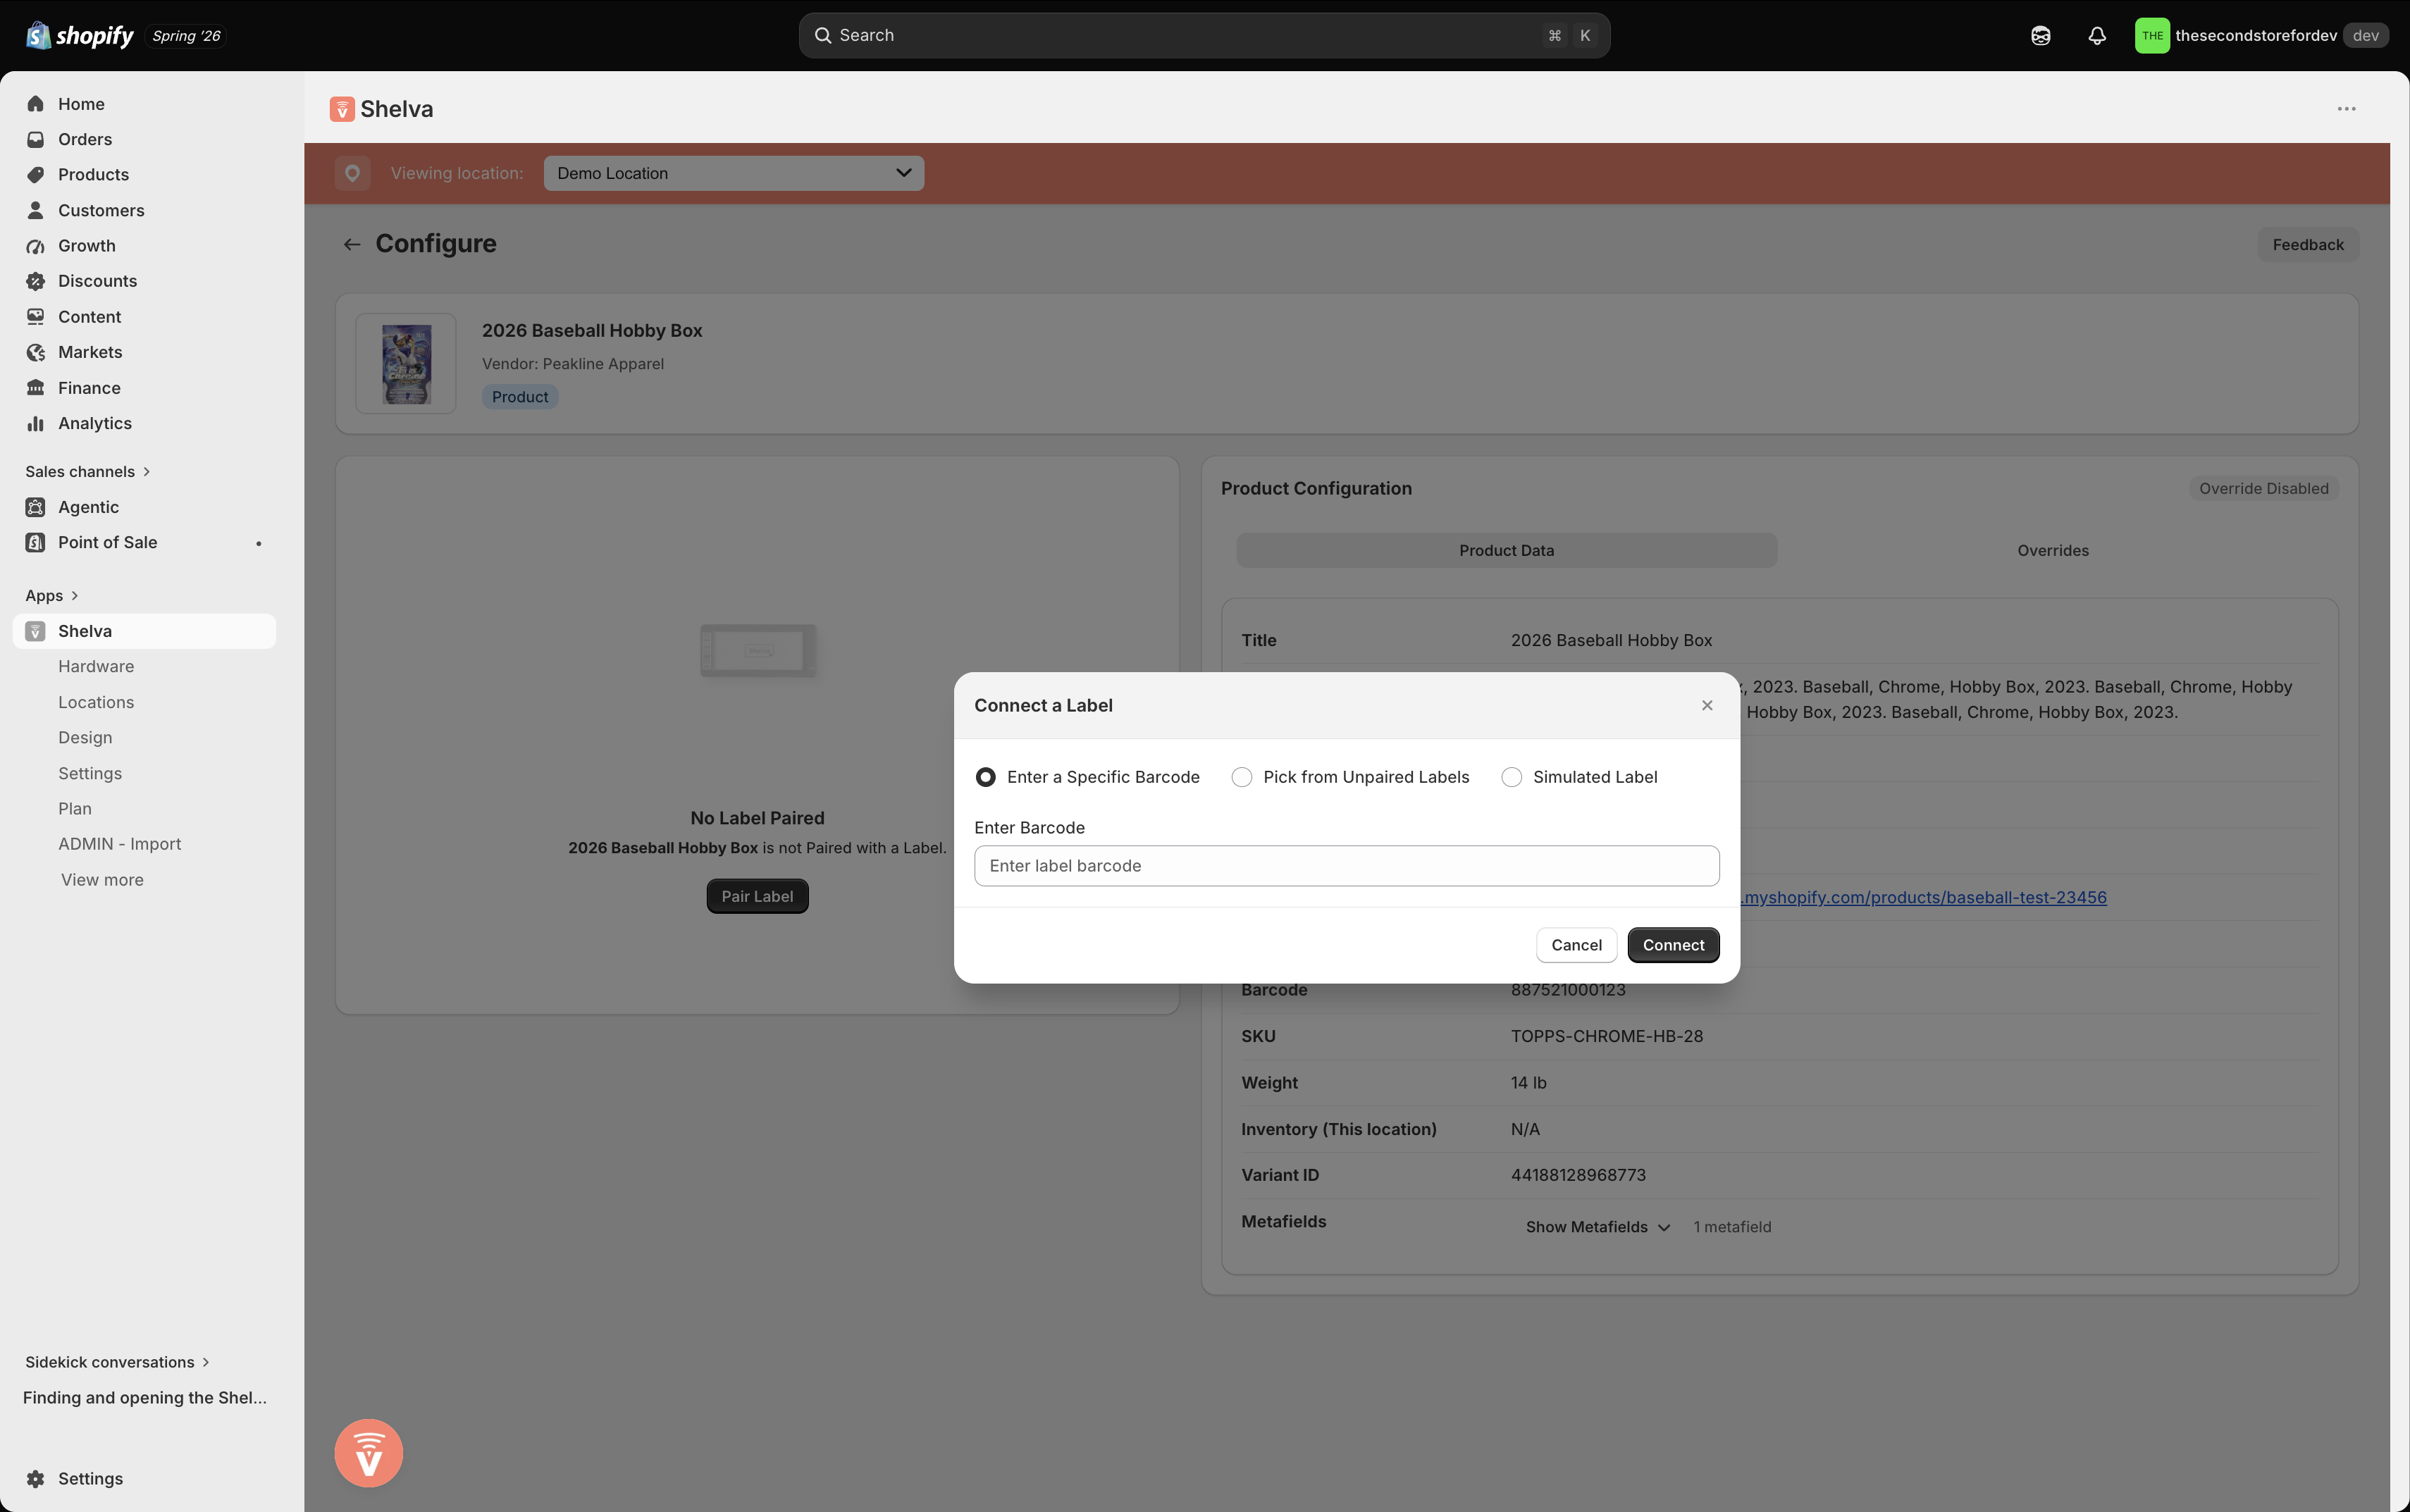
Type or scan the printed barcode when you already know which physical label to use.
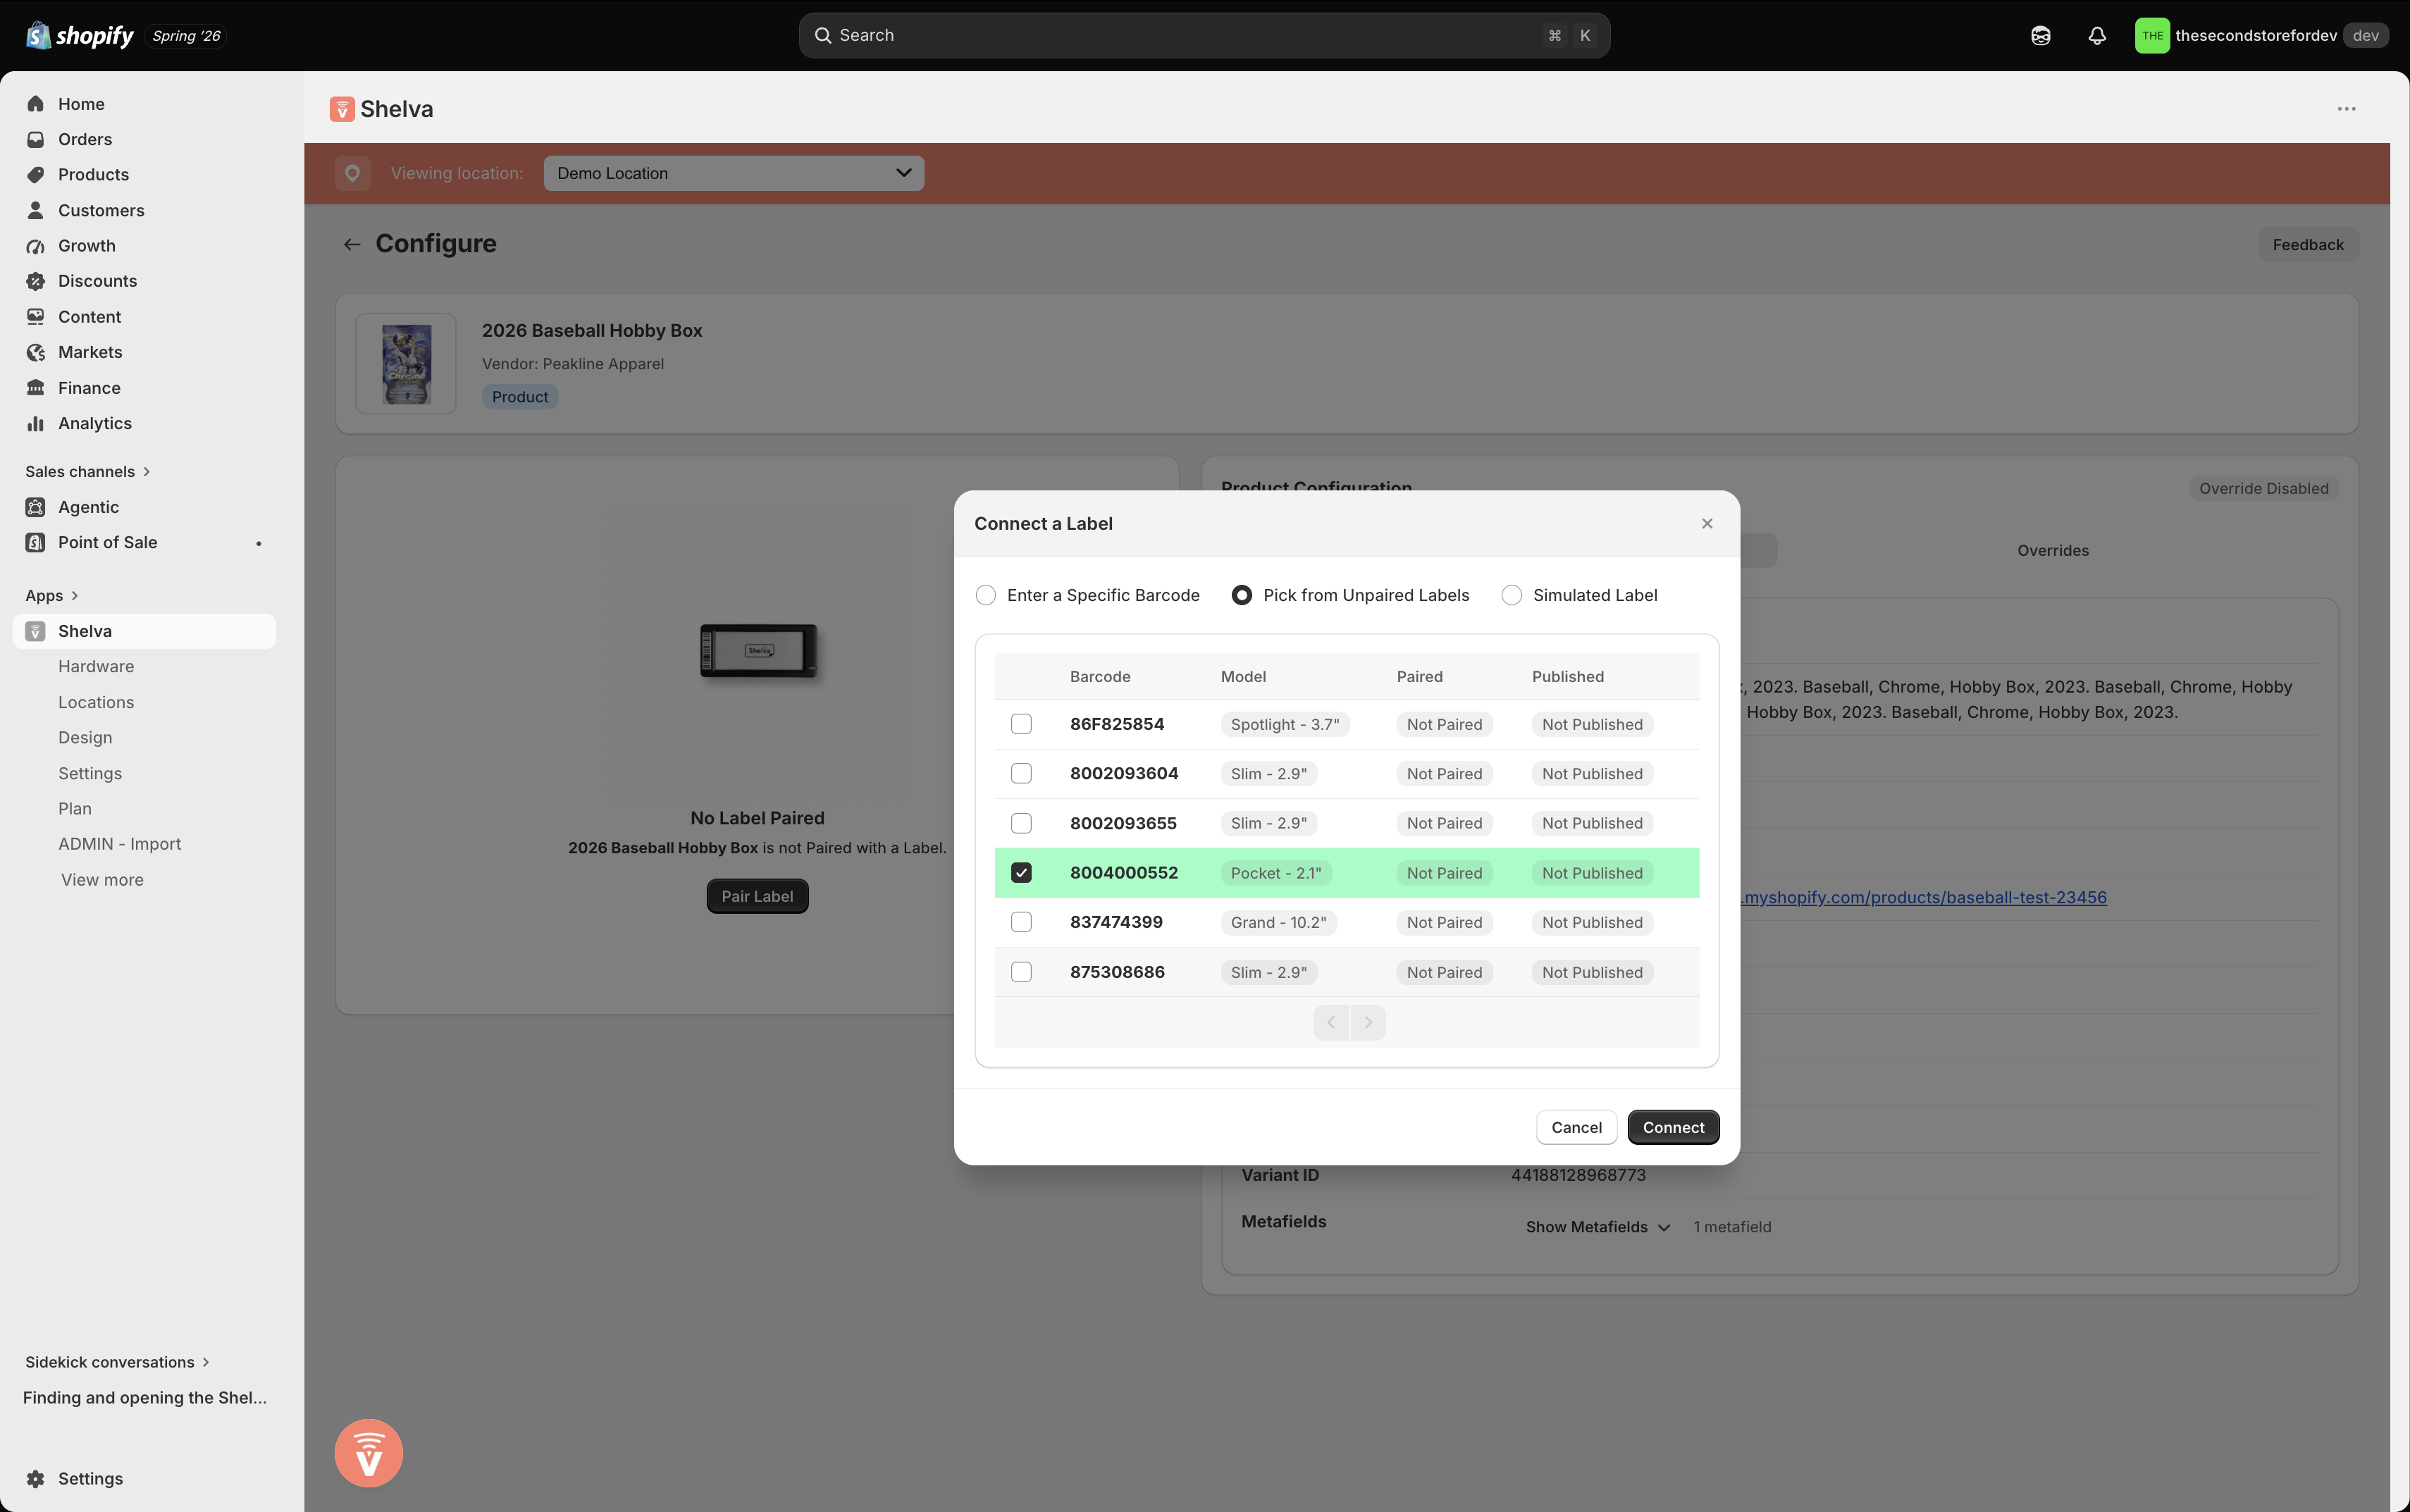
Choose a registered, available label from the current location.
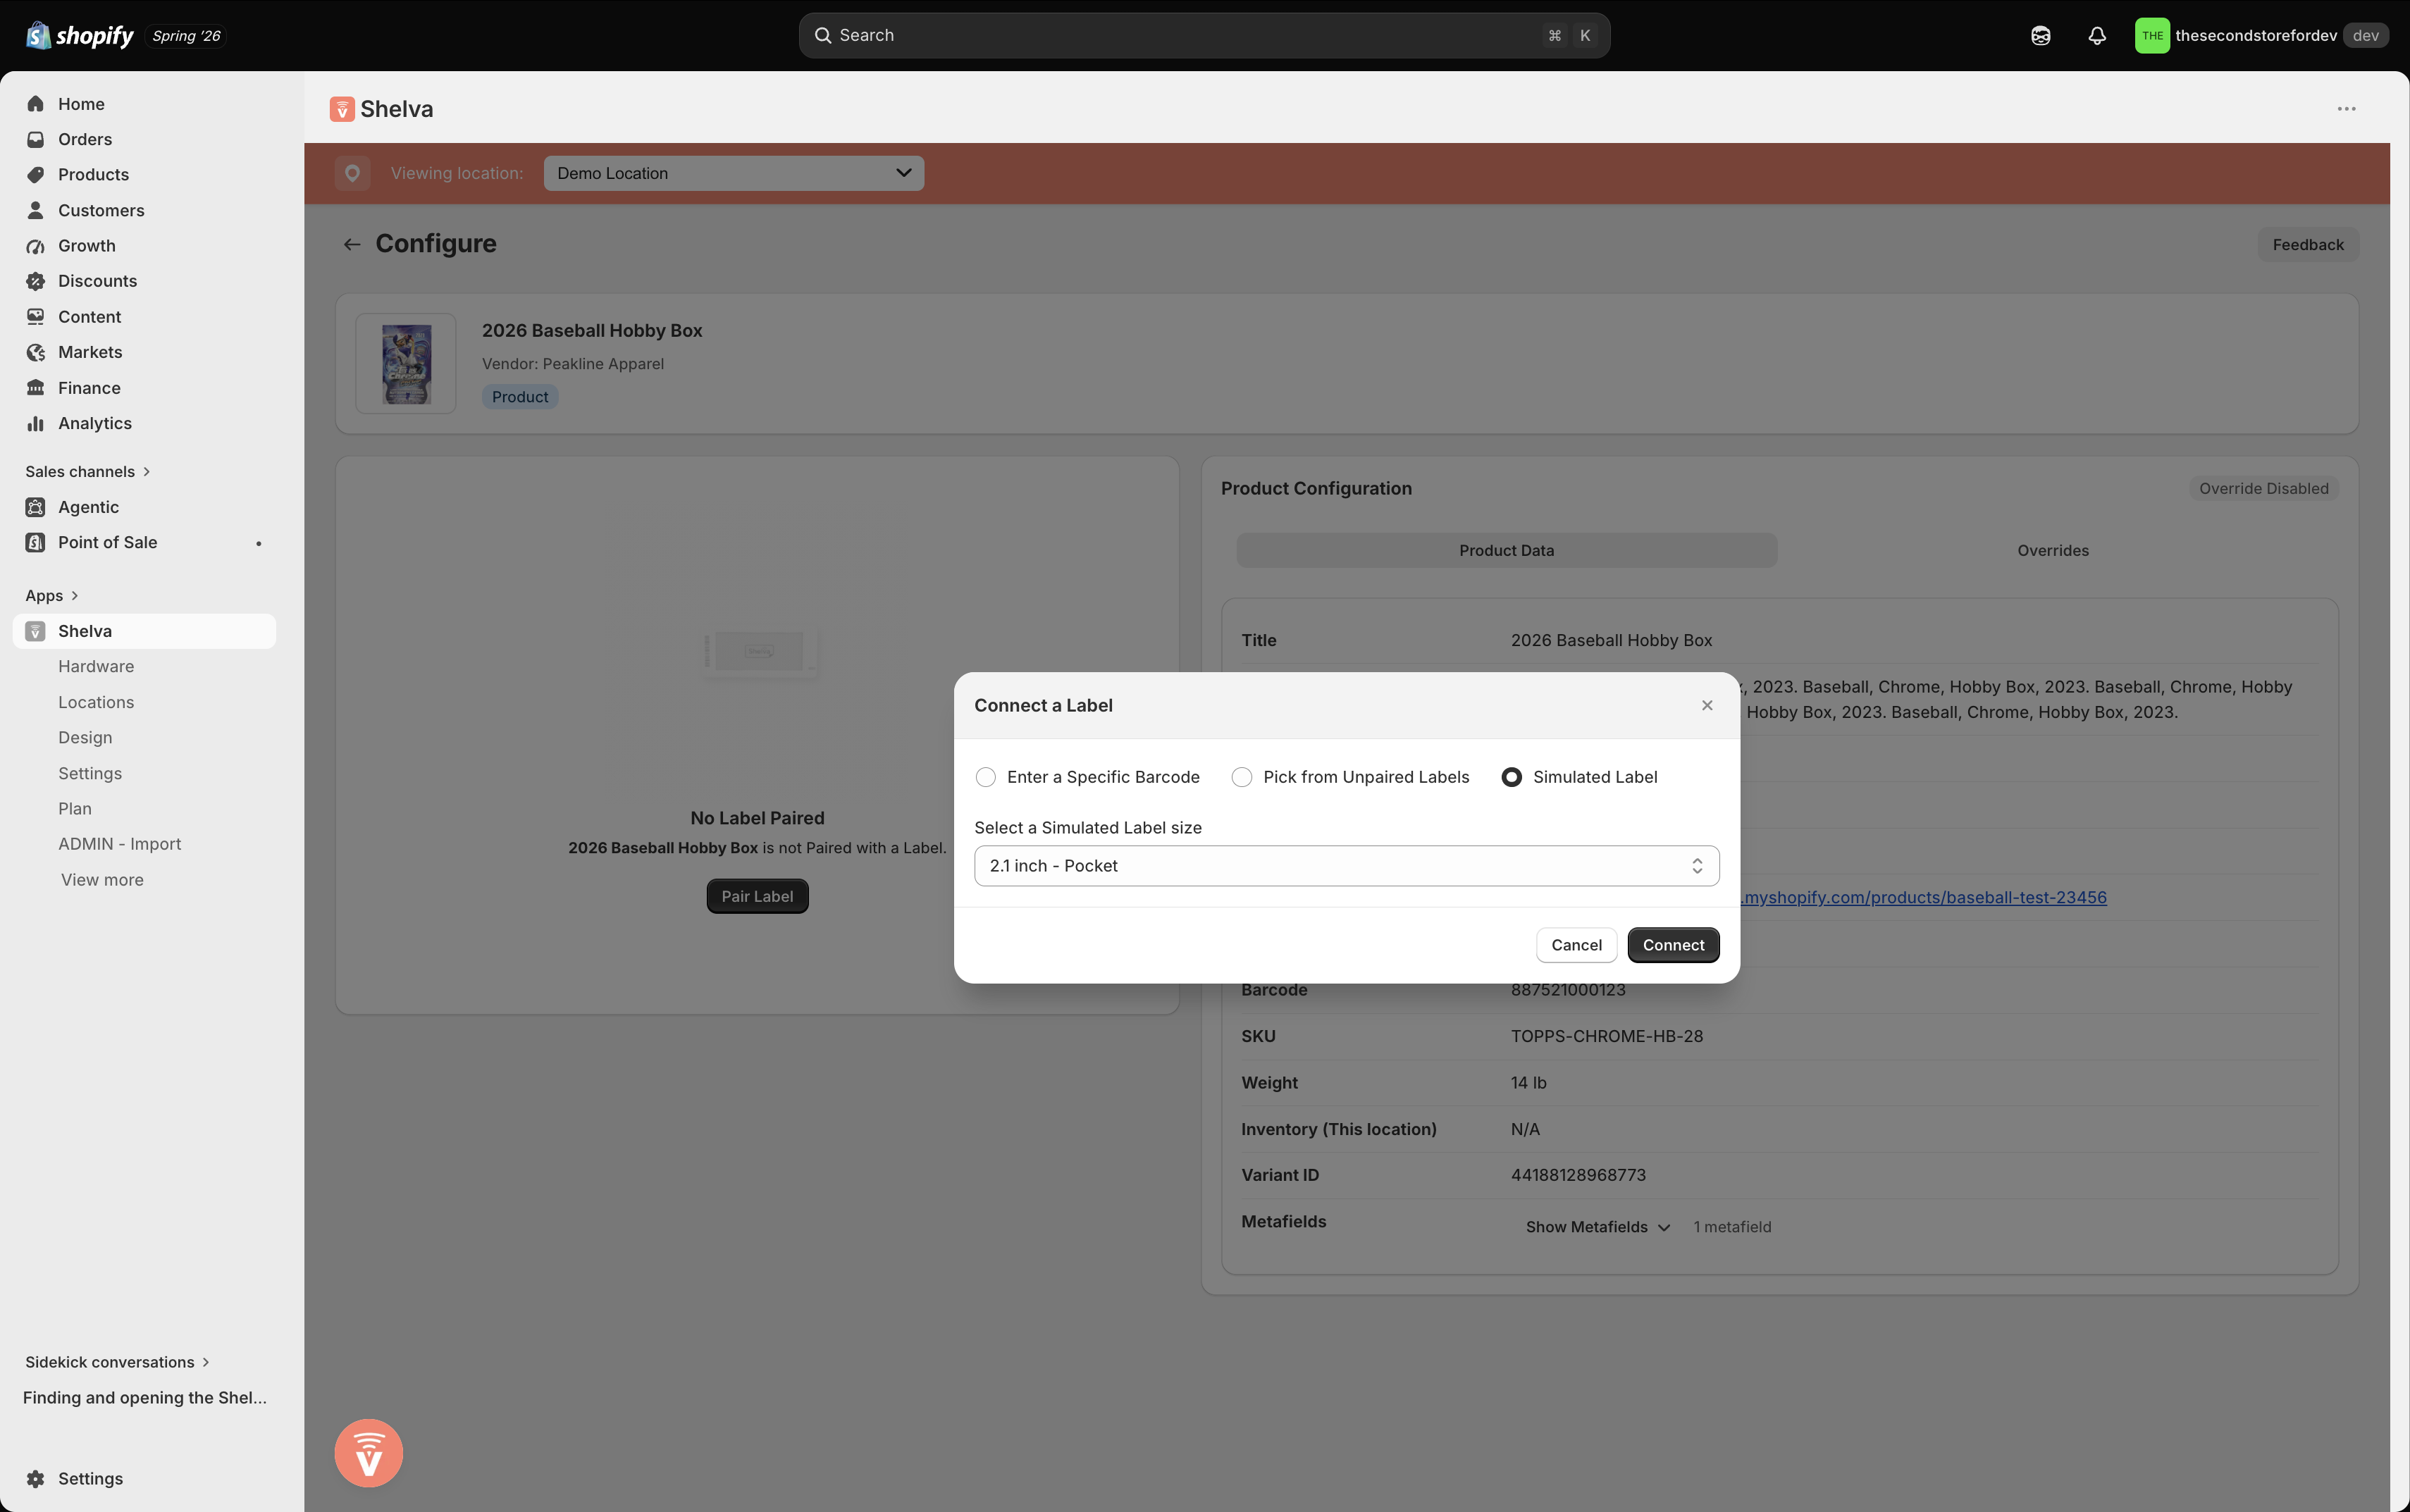
Use a simulated label to test the workflow without sending a hardware command.
Add another label to a product
A product or variant can have multiple assigned labels. Select Add Another Label to keep existing assignments and add one more.
Publishing from Configure sends the current design to the assigned physical labels. The primary label is visually distinguished from additional labels, but that does not mean only the primary label is updated.
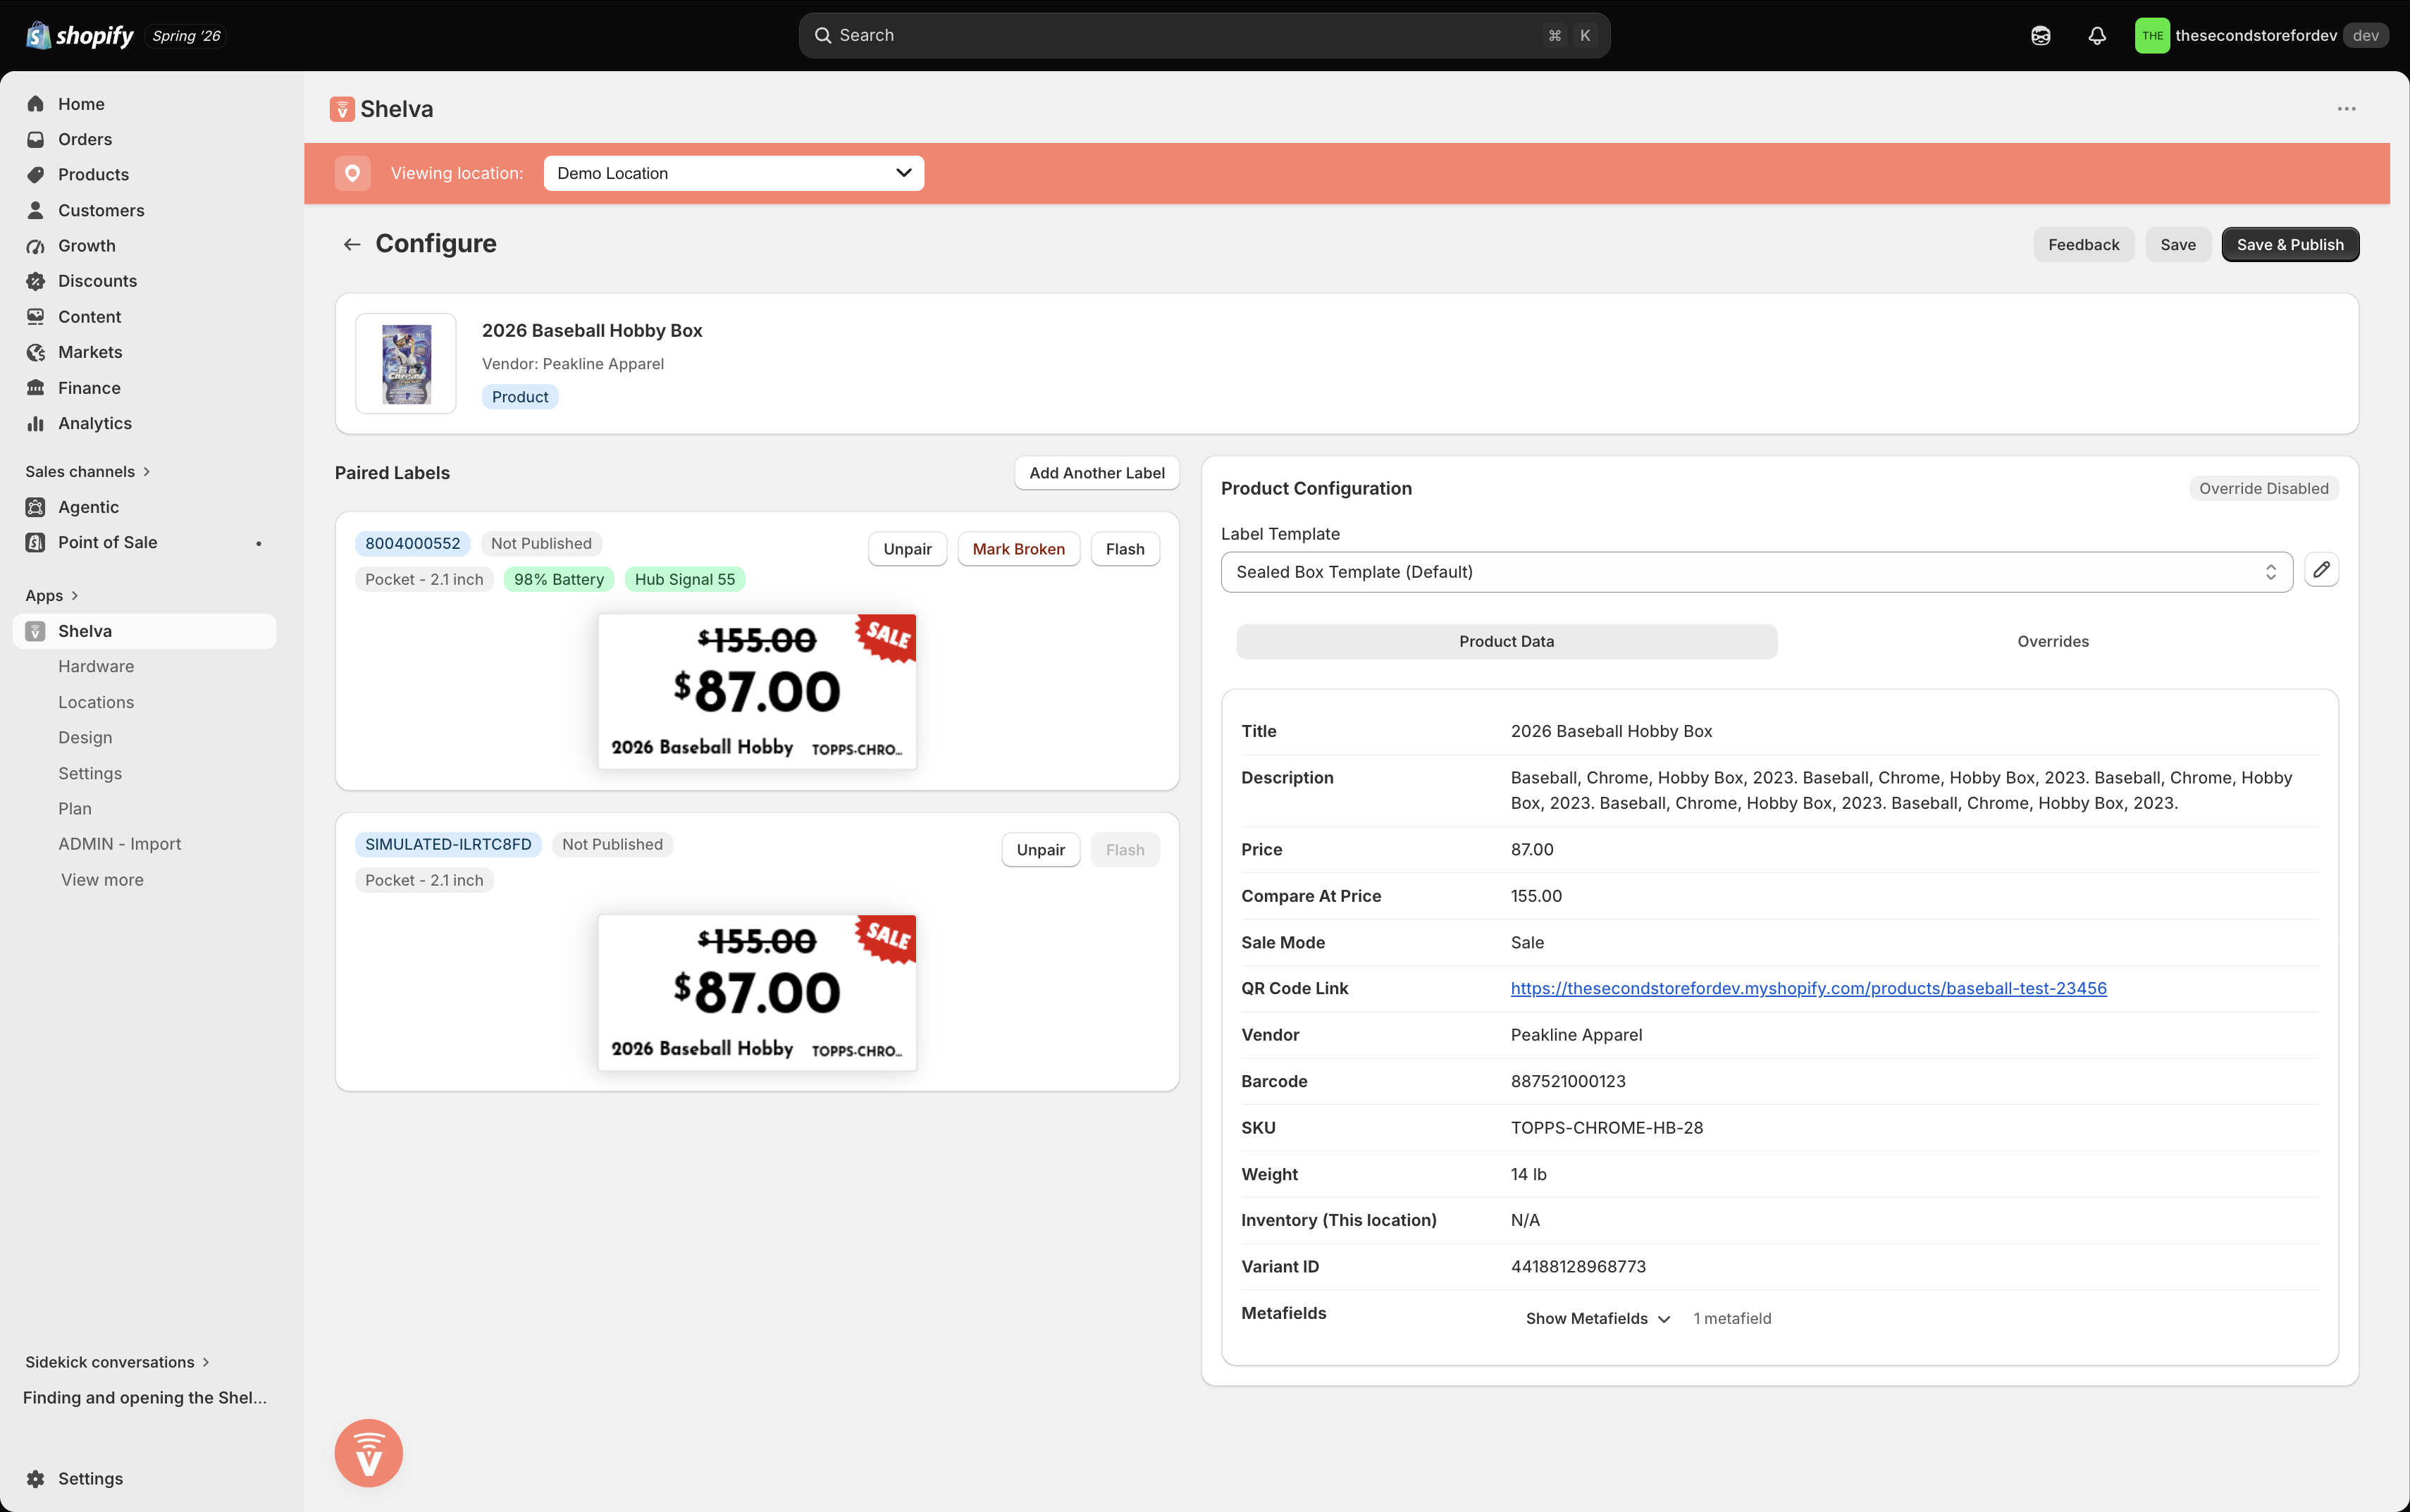
Configure shows every label currently assigned to the product before you publish.
Pair Grand labels correctly
Replace an existing pairing
If you enter or scan an already-paired label, Shelva shows the product currently using it.
- Review the current product and location carefully.
- Confirm that the existing assignment should be replaced.
- Select the replacement confirmation shown by Shelva, then publish the new product when ready.
Unpair, reassign, or mark a label broken
| Action | What it does |
|---|---|
| Unpair | Disconnects the label and clears its physical display when possible. |
| Reassign / Quick Swap | Moves one label to another product. |
| Add Another Label | Keeps current assignments and adds another label. |
| Mark Broken | Unpairs, clears, and prevents future pairing until the label is marked working. |
What success looks like
Configure shows the correct label barcode and preview. Physical labels progress from Paired to Publishing and then Published; simulated labels update their preview without a hardware command.
This image shows the Save and Save & Publish buttons. Select Save & Publish when the preview is ready to send to the paired physical labels.